|
Feel free to share these items with family and friends. Follow the directions on how to download this information to your disk. If you wish to use the pattern for other personal use, please see our Usage Notes page. |
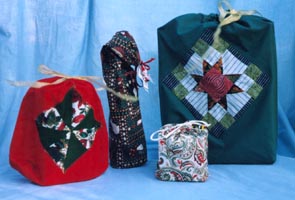
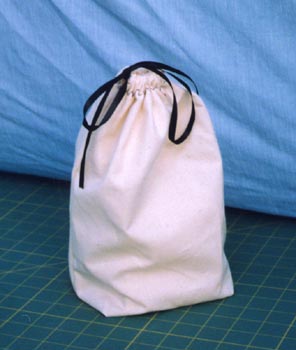
Make these fast and fun gift bags to personalize your gift giving and help reduce paper waste in the environment. Encourage the recipient to reuse the bag for someone else. The bags can be simple or highly decorated. If you are a quilter, you probably have a fabric stash with fabrics appropriate for many seasons, reasons and people. If you are in a pinch for gift wrap, you can go to you fabric collection and make a jiffy, reusable, custom gift bag.
Quick Links to information further down the page
Size Suggestions
Fabric Choices
Embellishment Ideas
Basic Directions
1. Cut two rectangles of the same size (Click HERE for size suggestions).
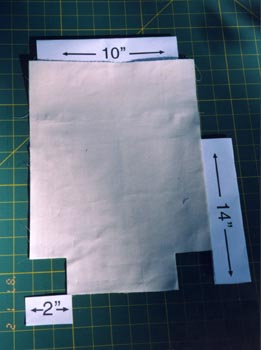
2. Cut a square out of each bottom corner.

3. Sew rectangles of cloth together on sides and bottom edges (right sides together).
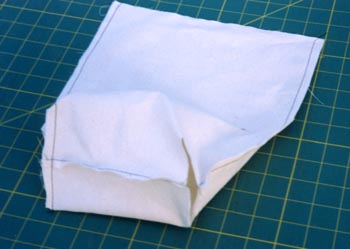
4. Open bag and fold so that one side seam lines up with bottom seam. Sew along the diagonal which is formed. Repeat for other side.
5. Fold top edge down about an inch and top stitch around bag to form casing for cord. Use straight or zig-zag stitch.
6. Turn bag so right sides are outside. Use your seam ripper to remove a few stitches on one side seam to provide an opening for the drawstring.
7. Pin safety pin to end of grill grain ribbon, metallic cord or self made cord and string through casing. The cord should be about three times the width of the bag. After cord is through casing, tie a small knot at each end.
(To make your own cord, cut a length of the desired fabric 1 1/2" wide by about three times the width of the bag. Fold over twice (so raw edges are inside the fold) and top stitch with either straight of zig-zag stitches).
You can make the gift bags any size you like. In general cut the rectangles taller than wide (4 or 5 inches difference is good)
Size Suggestions
Small - Cut 6" x 10" rectangles. Cut out bottom squares about 1 1/4" x 1 1/4".
Medium -Cut 10" x 14" rectangles. Cut out bottom squares about 2" x 2".
Large -Cut 14" x 20" rectangles. Cut out bottom squares about 2 1/2" x 2 1/2"
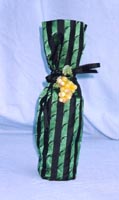
Wine Bottles - 7" x 16". Cut out bottom squares about 1 1/4" x 1 1/4"
Compact Disk Bag - 8" x 12". Cut out bottom squares about 1" x 1"

Fabric Choices
1.You can use printed holiday fabric or fabric which seems appropriate for the recipient or occasion.
2. Choose a plain or simple background fabric and embellish it.
Embellishment Ideas
1. Use a plain fabric and cut out a panel or section of specialty fabric. Attach specialty fabric to background fabric with wonder under. You can leave it at this or use a machine embroidery stitch to finish the edges. Or use liquid decorative sealer on the edge. Or you could appliqué decorative fabrics on top of the background.
2. Use photo transfer material or have a photo transfers made at a local copy store to create custom fabric with a favorite photograph or drawing.
3. Sew stuff on the bag, use buttons, trims, whatever you like.
4. Sew bells on the ends of the cords.
5. Use your imagination to create something special for your recipient.
|