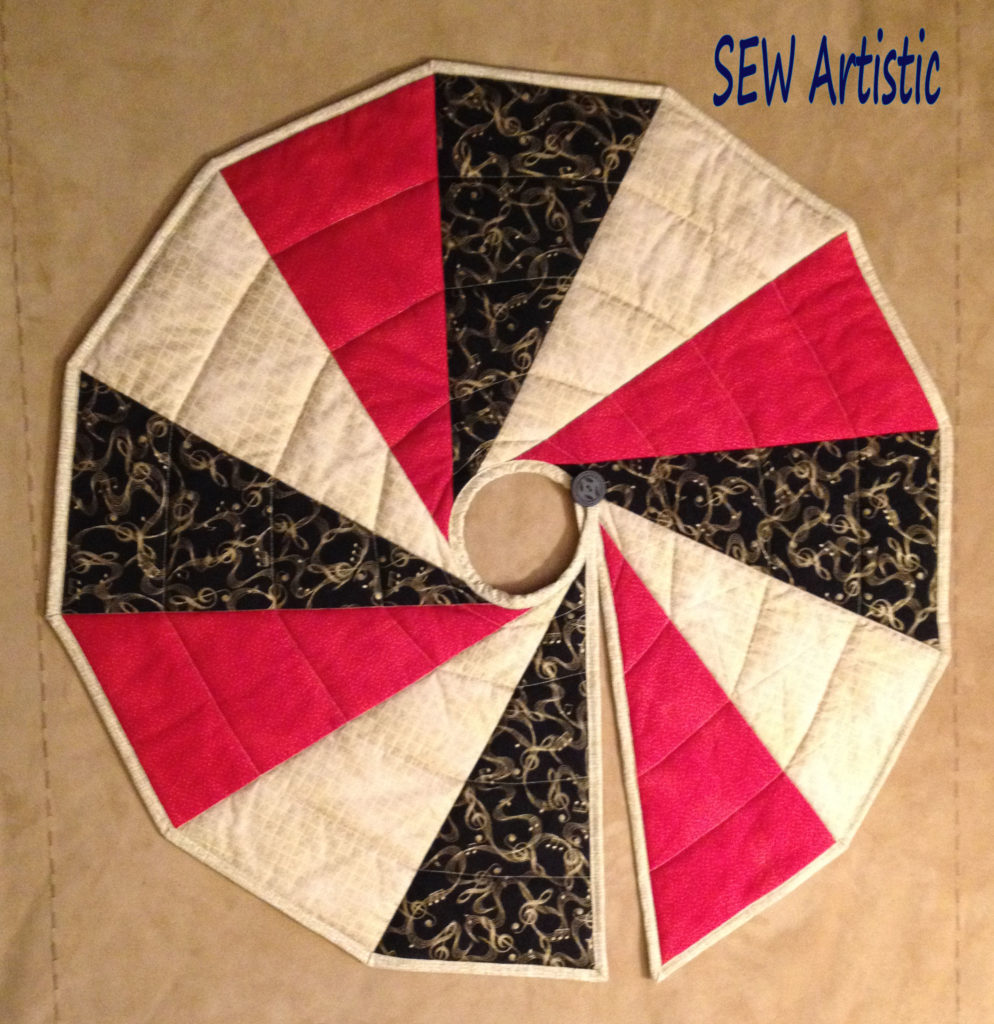
Quick Tree Skirt Pattern by Julia Deal

Despite the initial geometry used in development, the Modern Spiral Tree Skirt (SEW-104) was the most fun of any pattern I’ve written, and it came together in record time thanks to the mathematical assistance of my college age son. We collaborated on the trigonometry via text during his freshman year at RIT.

I was determined to design a wedged tree skirt that tessellated easily into a circle, yet didn’t waste lots of fabric. I also was hoping to utilize fat quarters since I had a stack of Christmas holiday fat quarters on hand.

For about a week my son and I texted back-and-forth. I would send the trigonometry question, and my son using his graphing calculator to calculate the answer. I was so excited when we finally got the geometry correct and the first tree skirt was sewn together successfully.

I am glad that he didn’t tell me until after it was all done: 

“Mom, you know there’s an app for that you could put on your phone! “. 

My response was “Yes; but having you help me was so much more fun!”

The tree skirt top is created from three fat quarters – with a few tiny slivers as the only waste. Additional fabric is needed for the backing & binding. Optional sashing can be used to increase the skirt size by a few inches. For ambitious quilters, there is also a two-sided version, with the wedges spiraling in opposite directions on each side.  And for my serger friends, there is a version you can make entirely on the serger, even the Decorative Thread binding!

Happy holiday Sewing from Julia at SEW Artistic

Posted in patterns, Uncategorized | Tagged , , , , | 2 Comments

Fractured Panels – Pillows or Wall Art

This is a very easy way to use small panels that are 6” to 12” square or rectangular. Sometimes you have them leftover from a project or sometimes you just bought them because they caught your eye.

No Pattern Required

You don’t even need a pattern to do this. Just start with scrap paper or scrap fabric and make a plan before cutting up your good fabric.

Here I had two panels and some coordinating fabrics. I cut the background pieces 19” square to allow for a ¼” seam allowance and a little extra space around the pillow f0rm and used an 18” pillow form.

You can put fusible web on the back of these fabrics first or use fusible fabric spray adhesive after they are cut. I cut shapes from scrap paper just to get the size I wanted. Then I used those for templates for my fabric.

Fuse the background shapes on first. Stitch around them with a blank stitch or zigzag as you please. Then cut and fuse the panel pieces on top and sew around them as well. This way they won’t come apart in the wash.

You can stuff your own pillows or use pillow forms.

Use Your Imagination

These would also look great as a set of wall art. They could be stretched on art canvas using spray adhesive – no sewing at all required.

Here we show them using a large print focal fabric.

Use your imagination for shapes and designs!

~Nancy

Posted in Uncategorized | 1 Comment

HOW TO FINISH A LINEN RUG WITH OPEN BACKGROUND

I hadn’t seen this done before but when I hooked my lighthouse rug pattern onto a linen background, I decided it would look like a dark stormy or dusky sky if I left the background unhooked.

NDD-604 Lighthouse Rug Punching/Rug Hooking Pattern

That left me wondering how I would finish it so that nothing showed through from the back. Here is the method I came up with that worked very well and was very easy to do.

First I laid the rug face down on the cutting mat. Then I cut a piece of fabric that was close to the color of the linen so it would not show through. You could use a darker fabric if you want a darker look or lighter if you wish. I cut this piece about 1” larger than the rug all the way around.

Then I pinned all around and stitched it down with a zigzag stitch.

Next, trim away the excess linen.

Now fold the fabric and linen edges together to the back and clip to hold it there.

Turn it over and make sure none of the linen is rolling around to the front. Adjust as necessary.

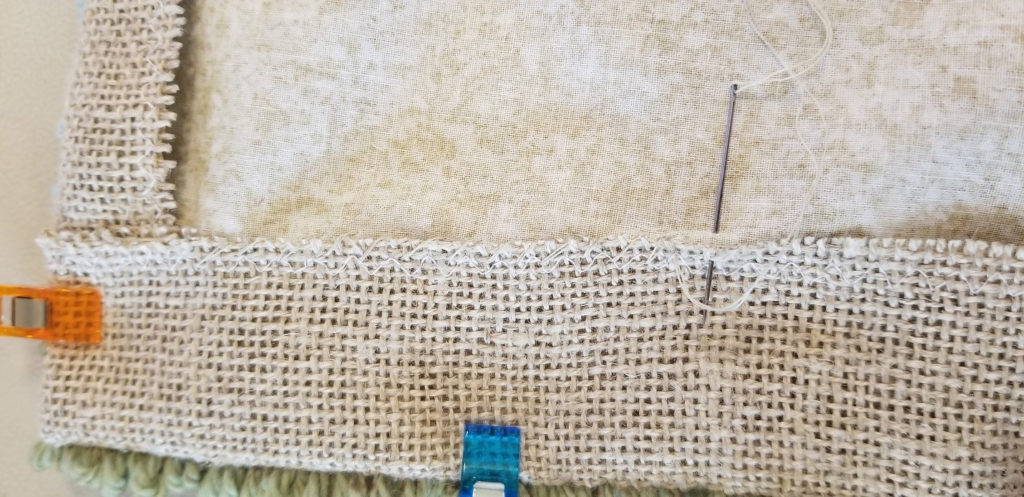
Hand stitch in place from the back.

Since the fabric is between the folded over part of the linen and the rug, you won’t see it through the linen that is exposed on the front.

Easy Peasy!

~Nancy

Visit QuiltWoman.com to purchase the

Lighthouse Rug Punching or Rug Hooking Pattern NDD-604

Posted in Helpful Tips, Techniques | Tagged , , , | Leave a comment

Yarn Inspiration

I went to visit my friend designer Barb Sackel a few months ago at her quaint home on a little lake where we always sit and talk about our latest projects. I bring along something new to work on and she is always working on something new as well. This time she was doing punch needle embroidery and rug hooking.

I was immediately enthralled especially with the beautiful hand-dyed wool yarns she was using that she had dyed herself. It wasn’t the dyeing process that was piquing my interest but rather the variegated colors and how they worked up in the punched work. The yarns are so gorgeous, I just couldn’t stop staring at them. I’m sure you’ve all seen fabric or a design like that, right?

I was suddenly reminded of doing punch needle embroidery as a teenager and remembered how much I loved it. Then Barb told me that you can use a larger punch for making rugs – ooh ooh! You know how we all get when we get inspired.

Exclusive Yarn Distributor!

Barb and I both love to design patterns so I bet you can guess that after a weekend of Oohs and Aahs and Oh Oh! and brainstorming we came up with many ideas for patterns of our own AND I left with boxes of hand-dyed yarns and was instantly appointed as her exclusive yarn distributor! Barb and I always inspire each other so much it is almost dangerous!

Barb’s Hand-Dyed Yarns

~Hand Spun -Fleece Hand Spun Yarn. 12 colors to choose from. Each skein contains 10 yards of yarn. Hand Spun yarn is considered Art Yarn when spun with fleece.

~Chunky -Corriedale Wool Yarn. 29 color options. 10 yards (weight .5 oz). Works beautifully for rug hooking/Punching.

~Fingering -Merino Wool Yarn. Over 45 different colors to choose from. Each skein is 87 yards .5oz. Equal to 6 strands of embroidery floss. Perfect for punch needle embroidery.

As soon as I got home, I ordered supplies for punch needle and rug punching which are now available on QuiltWoman.com as well.

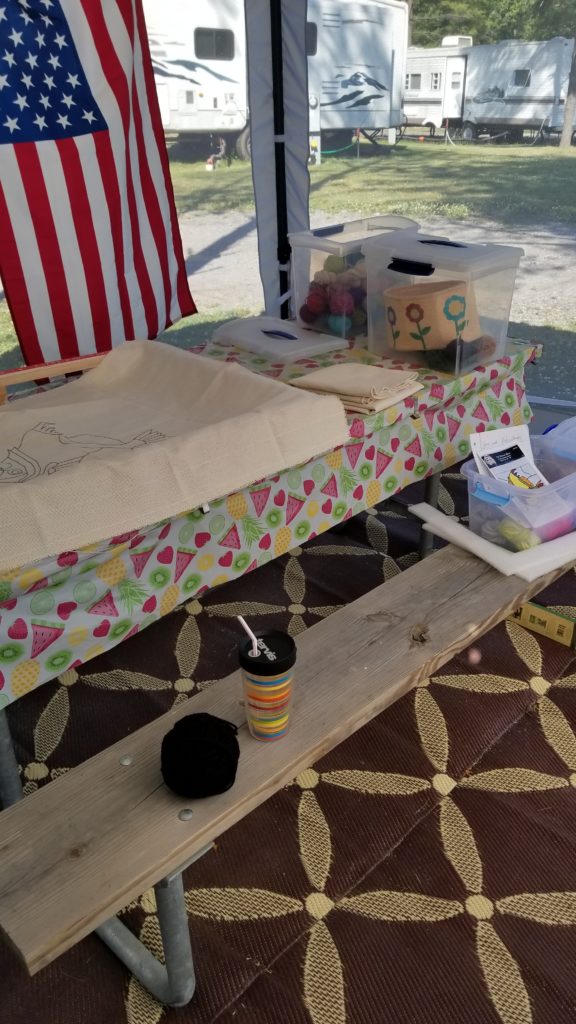
Then my husband and I built a throw rug punching/hooking frame from simple instructions on Youtube and I got to work on my new summer projects which, by the way, are very portable for taking to our camp.

Designing New Patterns

And of course Barb and I are busy designing new patterns for both punch needle embroidery which is done with a small punch and fingering yarn or embroidery floss and rug hooking/punching patterns which can be used for either method and use either a rug hook or larger rug punch that comes in 2 sizes.

In future blog posts I’m going to show you lots of different patterns that can be used for many different types of quilting and needlework. I hope you get as inspired as we did!

~Nancy

Posted in Uncategorized | 1 Comment

Stained Glass

​Years ago when I got back into quilting after my kids started school, I attended a large quilt show in Nashville.  I remember being overwhelmed by all the different types of quilting projects and I think I bought every quilting notion on the market. 

One type of quilting that always fascinated me was stained glass applique because I used to make real stained glass before I started my family and worried about working with the lead.  At the time I was still learning and the stained glass quilting instructions intimidated me. Later on when I started my pattern company I started working with a stained glass company who had thousands of patterns that we could easily transform into quilting applique patterns.  I developed my own method of doing the stained glass quilts and wrote up general instructions that could go with many stained glass patterns. 

Recently I was doing some research on Pinterest trends and discovered that real stained glass is having a surge in popularity as a craft which got me thinking there was no reason we couldn’t carry those on our website. So I emailed my contacts at Paned Expressions Studio and they were delighted with the idea. 

“Make it Your Way”

This week we are debuting the first dozen in our series of stained glass patterns AND our first five stained glass “Make it Your Way” needlework patterns which can be used for stained glass applique, regular applique,

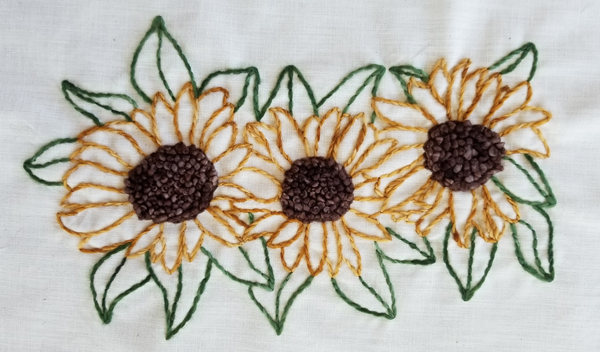
Or hand embroidery 

Or rug punching/hooking

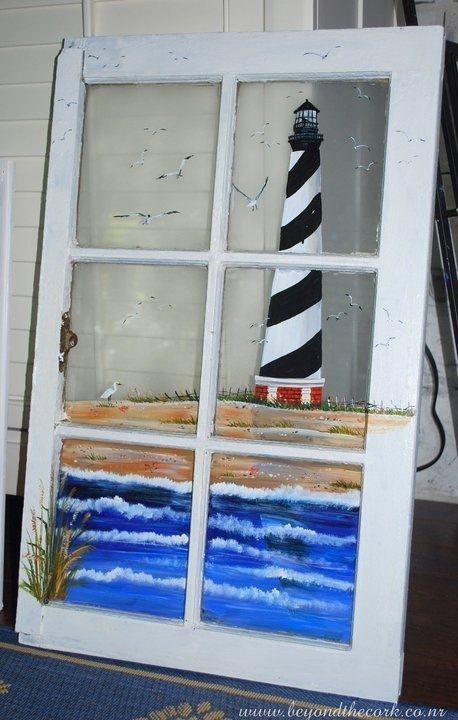
You can even trace a design on the glass in a picture frame and use glass paint to create a quick easy inexpensive piece of artwork to match something in your decor. Like this lighthouse that I found on Pinterest.

Find all of the Stained Glass, Stained Glass Quilts, Applique patterns here,

Embroidery patterns here,

and Rug Punching/Hooking patterns here.

Kits are Available for some of the designs!

Enjoy the variety of creative ideas and Make it YOUR way!

~Nancy

Posted in patterns | Tagged , , , , | Leave a comment

Itchin’ to be Stitchin’ with Felt

I just love the look of wool felt applique. I love the raised texture, the traditional and the modern looks that can be done with felt, and I really like that felt doesn’t ravel. What is also great about wool felt applique is that it is an easy handwork to do while traveling – my husband loves to drive. But the problem is, I’m allergic to wool!

Bamboo

For a long time now, I have been just admiring wool felt from a distance. Then I discovered bamboo felt. I was so excited to be able to use a product that acts the same way as wool, is soft and easy to work with but also high quality and not itch-inducing. And bamboo felt is actually hypoallergenic and eco friendly since bamboo grows so rapidly.

I remember having bamboo growing on our little farm when I was a young girl. We used to make “musical instruments” out of the hollow stems and hats from the large leaves. See, I’ve always been creative.

Bamboo Felt

I found a source to order the bamboo felt and it turns out that it is less expensive than some wool felt which was a surprise to me so I ordered all 24 beautiful rich colors which are now available on our website.

We have it available as individual 9″ x 10″ pieces or you can purchase a sample pack of all 24 colors. The sample packs can be ordered as 24 – 4.5″ x 5″ pieces, or 24 – 9″ x 10″ pieces.

Here are the links to order: Bamboo Felt Piece or Bamboo Felt Sample Pack.

Pattern and Kit

I thought you might also like to see one of the designs I’ve been playing with that is now available as a pattern and kit:

Little Hooked Primitive Rugs Pattern. Includes bonus pattern for the Mini Farm Family Felt Embroidery shown on the right. Or you can purchase just the kit.

I used two strands of embroidery floss and simple stitches to attach the applique pieces to a background of weaver’s cloth (quilting fabric stabilized on the back with Shape-flex which is a loosely woven fusible cotton interfacing can also be used. It makes the fabric easier to stitch on without making the needle harder to pull through and at the same time helps keep the darker threads from showing through). It’s fun that you can keep it simple or go nuts with the stitching. There is no right or wrong way to do hand embroidery – just have fun and make it your own!

Nancy

We have a great selection of wool patterns that can easily be made using Bamboo Felt!

Click Here to Shop!

Posted in Crafts, Fabric, Helpful Tips | Tagged , , , , , , | Leave a comment

Just Dropping In!

Sarah Vanderburgh is joining us today to introduce her new pattern.. Dropping In.

New Pattern

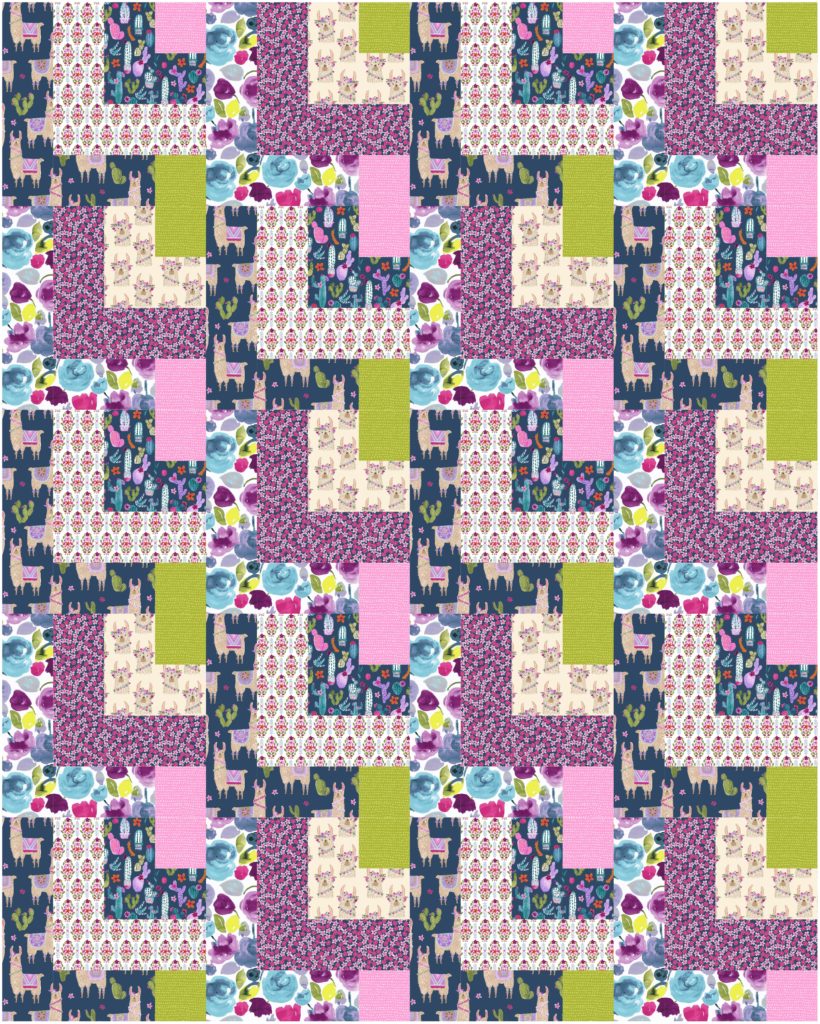
This quilt pattern is called Dropping In and was made to feature the line of fabric called No Cause for A-llama by Dear Stella.

Llamas!

First, you really should take a look at the fabrics. There are llamas in full pose, headshots, and some bright watercolour florals as well as a print with cacti. I was inspired to create with these fun prints and wanted to have big enough areas in the quilt to show off and use the directional prints. 

These blocks are very easy to piece and work up into a quilt in no time. Plus I can see using a favorite line of fabrics or themed novelty prints to make it a great pattern to use for gift quilts.

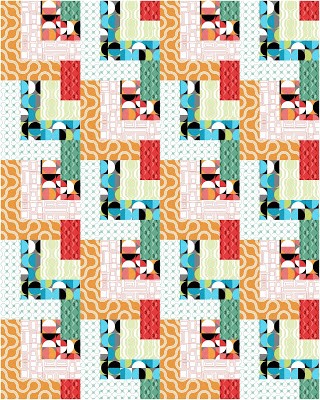
I ended up playing with a log cabin and placing fabric to create capital letter “L”s for llama going down the quilt. I was pretty thrilled when Dear Stella picked this pattern as one of their project patterns.

Same Quilt Pattern… More Fun Fabrics

{I had way too much fun playing with the Good Vibes fabric and the Dropping In pattern! So many possibilities and the ‘vibe’ of the quilt changes with each one.}

Sarah

The Dropping In pattern includes 3 sizes, 

Lap/Throw 48″ x 60″

Twin 60″ x 72″

and Queen 96″ x 96″

A modern quilt design with no borders and large blocks. This pattern invites the quilter to play with big prints and to explore creating movement across a quilt.

You can purchase the Dropping In pattern on the QuiltWoman.com website. Click here to purchase.

Click Here to view our full selection of patterns from

Sarah Vanderburgh of Sew Joy Creations.

Posted in patterns | Tagged , , , | 1 Comment

Make It Your Way

Introducing a new pattern series by Nancy Dill, Owner of QuiltWoman.com. Use these patterns for Hand Embroidery, Punch Needle Embroidery, Rug Punching or Hooking, Applique, or any other craft you can adapt them to.

The first patterns in the series will be 4 different succulents. We are launching the first one in the series this week called Desert Cactus.

Hand Embroidery

Here is my hand embroidery version on a kitchen towel.

Hand Embroidery

Punch Needle

This version shows it done in punch needle embroidery framed in a 6” hoop.

Punch Needle Embroidery

You can buy all you need for Hand and Punch Needle Embroidery at Quiltwoman.com

Applique

Then I blew it up to 9” so you can use it for applique in a quilt block wall hanging, for framing in a 10” hoop, or making a pillow or in a quilt with the rest of the succulent series.

I had fun using a stripe there!


Click here to buy your copy –

Nancy

Posted in Crafts, patterns | Tagged , , , , , , | 2 Comments

Three Different Ways to Make Rugs

You probably remember the first kind, they were very popular in the 60’s and 70’s.

Latch Hook Rugs

The hook had a little door on it and you worked with a 3” piece of yarn. You started at the bottom and row by row worked your way up to the top. The canvas was preprinted and you just followed the colors.

Well we are now hooking rugs, much like one hundred years ago, using everything we can find. It is a way of going green. The thrift stores have a bounty of treasures and rug hookers are on the hunt.

QuiltWoman.com now offers patterns for the two popular rug making techniques, Rug Hooking and Rug Punching (also called Oxford punch which is a popular brand name). Patterns, yarns, backings and much more stocked to give you hours of enjoyment in your journey of rug making.

Traditional Rug Hooking Using Mixed Media

There are rugs that were made for the floor and lasting through decades of use. Many people still make utility rugs today. The use of wool is warranted for the rugs to warm the floor.

But wall decorations are another whole matter. Anything goes with the decorative rugs. Along with wool strips, there are handspun yarns, rovings, dyed yarns, decorative yarns, sari silk, jersey, velvet and ribbons. The list is only limited by your imagination.
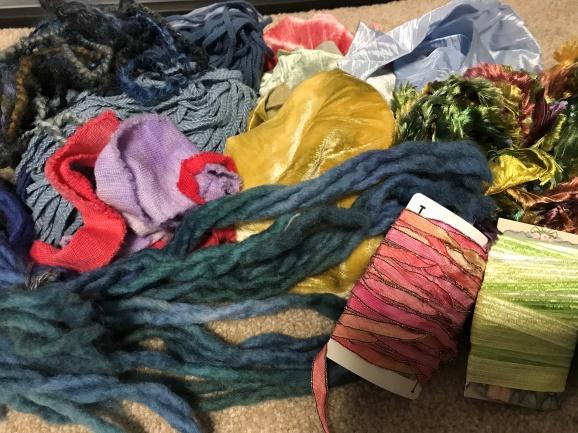
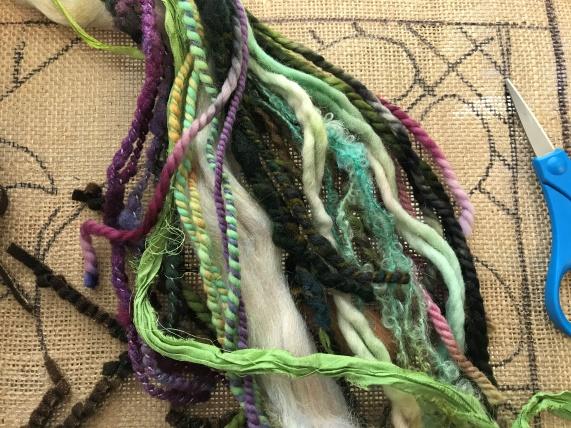
First a little bit about Hooking Rugs. There are a couple of things you need. 

Backing: Burlap, Linen or Monks Cloth

Hook

Hoop or Frame to hold your background tight.

Cloth strips, Yarn or whatever you want to hook with.

Hooks come in all styles and sizes. The size refers to the hook at the end. It is shaped like a crochet hook (you can use one of these in a pinch) except the tip is a little more pointed.As true with any tool, buy the best you can afford. The hook on the left is a beginner hook and can have some roughness to the end. The middle hook is a pencil hook and you hold it like a pencil. They go for around $40. The hook on the right is an Ergonomic hook and you can see the shaft goes from small to large to make the opening in the background to pull larger pieces through. It is a Hartman hook (now called an Irish Hook) and they generally run about $50. The size 5mm is for doing larger hooking, such as homespuns and thick yarn, however, the smaller hook works just fine for these also.

How To Rug Hook

What does hooking look like? There are many videos on the web that teach the art of hooking but in general you are inserting your hook into the background and catching the fabric strip or yarn underneath (your opposite hand will feed the hook) and bringing up a loop. That’s it. The beginning and end of the strip is always brought to the top and snipped off.
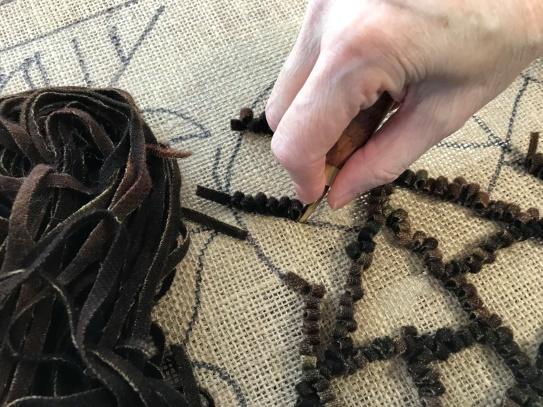

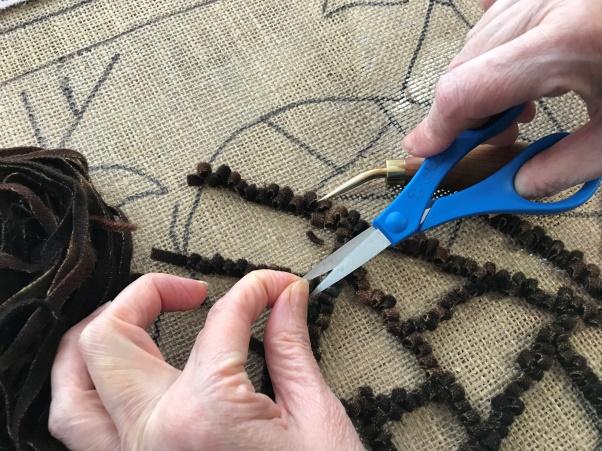
What do the textures look like in a rug? They make an amazing visual. Instead of your rug being flat and one dimensional, it is now full of texture and excitement.
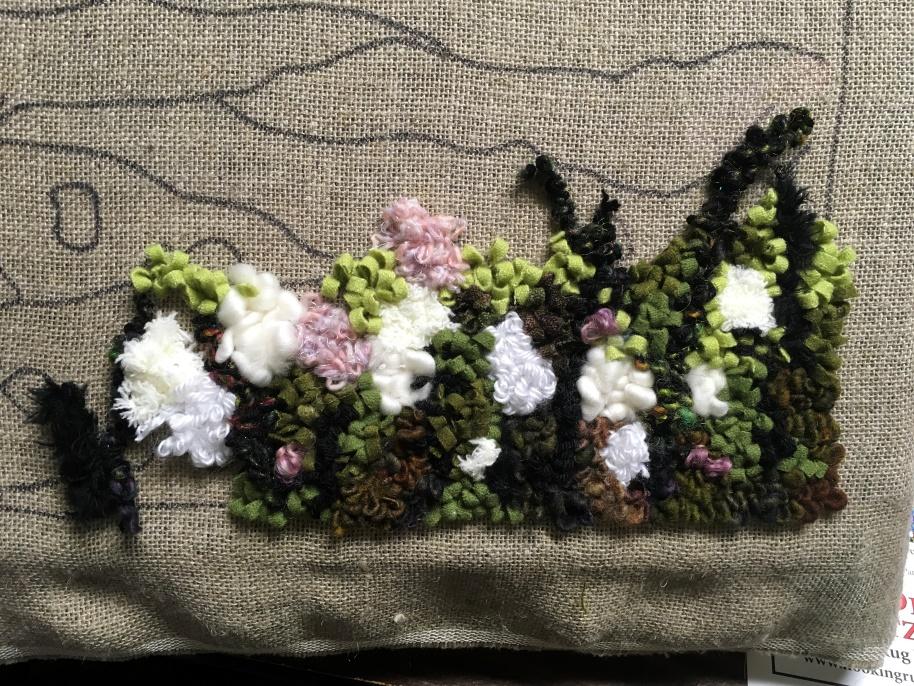
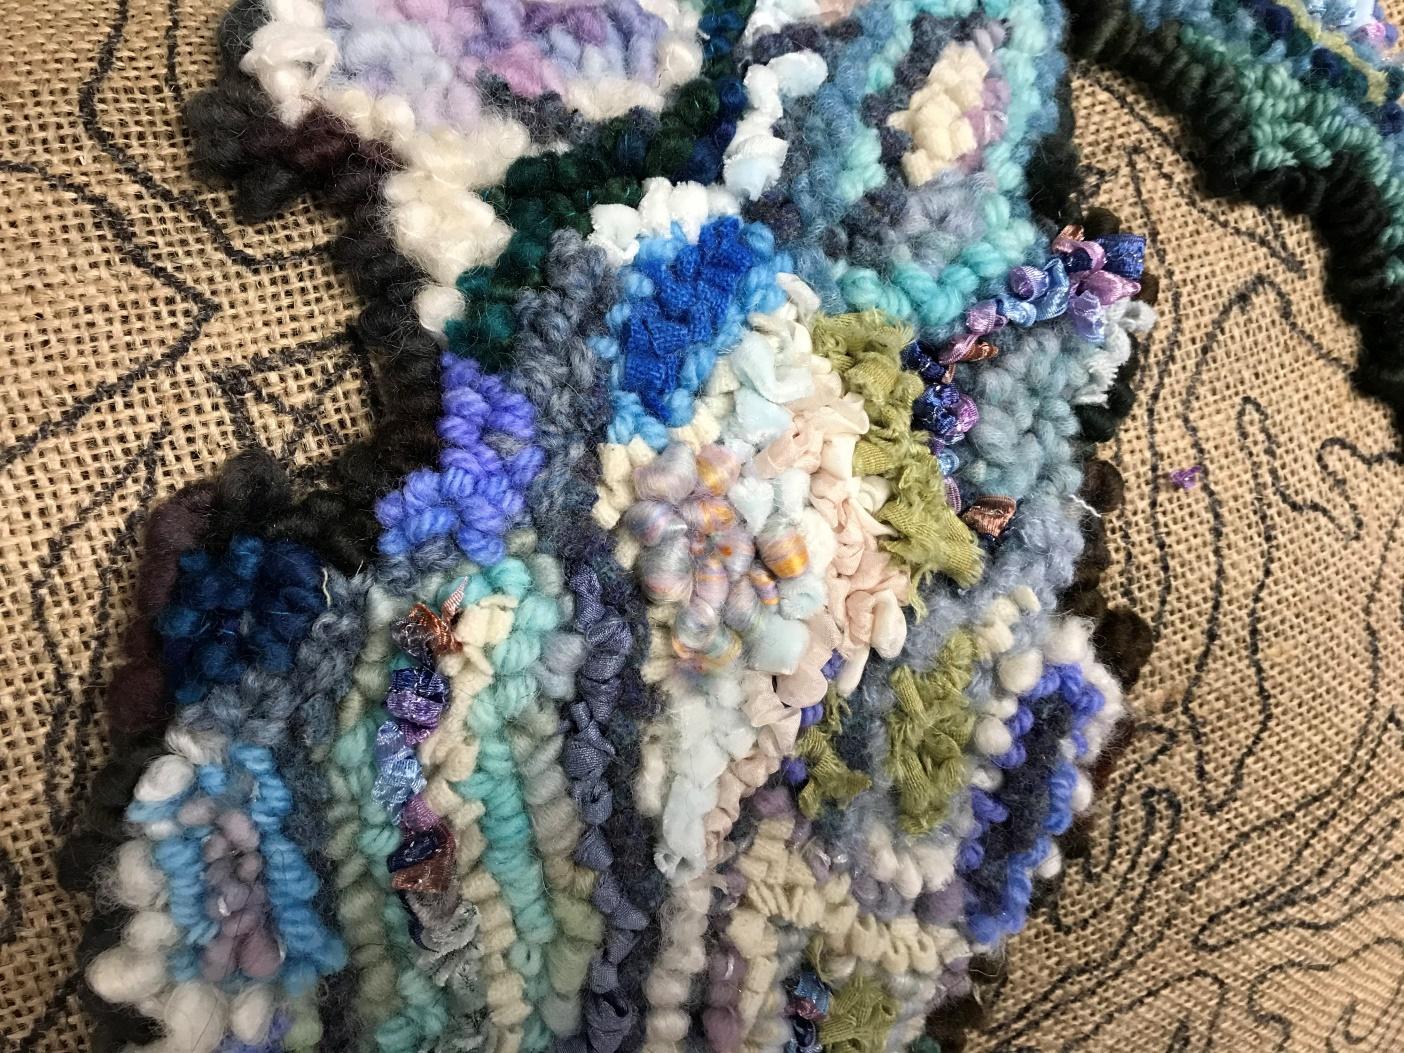
Can you find all the textures? Roving in the center, colorful ribbon, linen, sari silk, wool strips (worms) and plenty of yarn.

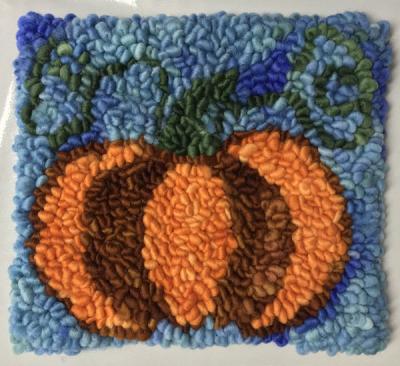
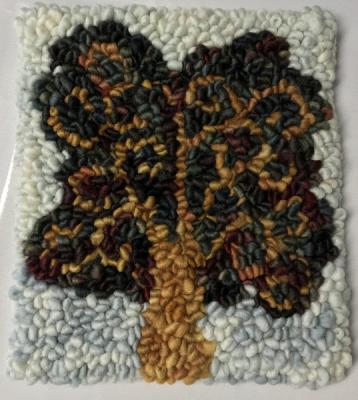
QuiltWoman.com will be carrying mixed media rugs for your enjoyment, however to get you started we have made some beginner rugs using just Barb’s Hand Dyed Chunky Yarn. Kits are available. All Patterns are 7” x 8”.

Watch for a upcoming blog posts featuring Rug Punching with Oxford punches.

Browse the selection of patterns, yarns, and supplies at Quiltwoman.com

Posted in Crafts | Tagged , , , | Leave a comment

Get a Grip(py)!!!

Are your rulers and templates slipping away from you? Or are you tired of walking your hand up your ruler as you cut. Well no longer! Now there is Grippy!
Grippy is made by Odif, the same company that makes the 505 Basting Spray (I love that stuff)!

So, What is Grippy?

Grippy is a non-permanent, non-slip adhesive aerosol that is a little miracle in a can. You can use Grippy on glass, paper, plastic, rulers, wood, and carpet to create a non-slip surface. Things stay in place while still being repositionable.

H0w to use:

Here is how to use Grippy. In a well ventilated area put your ruler (or template, or piece of glass, or rug, or whatever you are wanting to make non-slip) top down on a white sheet of paper to protect the surface you are spraying on. Shake the can well. Spray a thin layer from 8 inches away. You might want to step away until the cloud settles a bit…and because it has a pretty strong odor. In just a couple of minutes the adhesive will be dry, translucent, and ready to use. And don’t worry…you can apply Grippy Non-slip Adhesive Aerosol multiple times to things without staining.. it is acid-free.

The first thing I tried this product on was a very old ruler. I sprayed a thin coating of it on and to my surprise it has lasted for months and works great. My ruler does not slide. It grips the fabric beautifully.

Tip: If you do notice your ruler starting to lose its gripping power, just rinse off the ruler and let it dry. You are now back in business! You can also spray on a new coat if necessary.

Did you spray one too many coats of Grippy on your ruler? Not to worry. You can remove Grippy Non-slip Adhesive with Odif DK5.

-Nancy

Here is the link to Get a Grip…Grippy that is!

**This blog contains affiliate links. If you make a purchase, QW will get a small commission at no additional cost to you. Thank you for your support.

Posted in Helpful Tools, Notions | Tagged , , , , , | Leave a comment